Kitchen Decorating
Paint and Color Ideas
When it comes to kitchen decorating, paint and color can make all the difference in how your project turns out. Read on to learn how to enhance and pull together your kitchen design colors with the right painting idea and technique...
Home is where the heart is, and the kitchen is the heart of the home! It's where we congregate to nourish our bodies, reconnect with family, and entertain our friends.
Color plays a big role in setting a mood for any room and painting is the easiest and most cost effective first step in adding that color.
But how do you know which color will be right?
In Kitchen Decorating,
Paint Colors Can Make or Break the Space
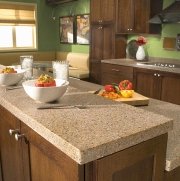
When deciding on a kitchen paint color, take a cue from the colors in the rest of your home - including artwork and accessories.
This doesn't necessarily mean that if your existing colors throughout the house are mainly blue and green, you have to paint the kitchen blue or green.
Choosing a complementary color will add more interest by breaking things up a bit, while adding accessories that are blue and green will keep the cohesiveness with the rest of the house.
Every room should have a focal point and the kitchen is no exception. It might be your beautiful new cabinets, an antique rug, or a favorite piece of artwork. Focus first on this area and build around it.
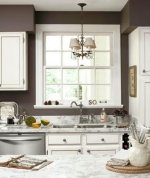
If your focal point has several colors in it, select the third or fourth most predominant color and use this as the main color for your walls. Why? Because it will make your focal point "pop" without fighting with it or taking away from it.
If you try to match the predominant colors, then all you will see upon entering the room is that one color.
The same goes if your focal point is your cabinets. Choosing a color too close to the color of your cabinets will hide their beauty because all the eye sees is one wall of the same color.
For example, if your cabinets are dark wood, choosing a lighter shade of paint, whether it be in the same color family or a complementary color, will make those cabinets the star of your kitchen. Likewise, light wood cabinets are showcased by using darker or more vibrant colors on the walls.
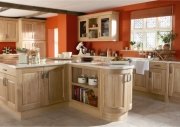
It is also important to consider color value and hue. Value is defined as the relative darkness or lightness of a color, and hue is the term used for the full spectrum of colors.
If the colors throughout the rest of your home are muted or grayed, a bright orange wall in the kitchen might seem jarring. So if you don't want to be jolted with your morning cup of coffee, select a color of orange that has a lighter value and lower intensity, and then add in the punches of brighter colors in your accessories.
Idea for Kitchen Decorating:
Paint Those Cabinets!
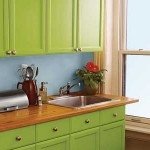
Are your cabinets old and outdated? Consider painting them as well! This gives you the opportunity to do something really creative and fun without the expense of buying all new cabinets.
Take a look at the photo on the right: the yellow-based green of these cabinets accentuates the warm tones in the wood of the counter top, and the blue on the walls adds a nice contrast - creating a sense of nature, by mimicking the sky, grass, and trees (the wood).
But going one step further by decorating your cabinet doors can really transform them into an elegant or whimsical focal point.
Not an artist? There are a multitude of products on the market, from stencils to wall decals, that will make you look like a DaVinci!
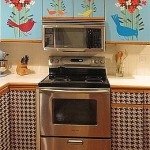
But for the true novice, wall decals are usually the best way to get started as all you have to do is peel and stick! The decals are also easily removable when you decide to change the look.
To make sure that your decals are correctly aligned, measure the decal from top to bottom and side to side. Then measure your cabinet door's front and mark the center point with a pencil.
Let's say your decal is 10" wide x 14" long. From your center point on the cabinet door, mark lightly with a pencil 5" to each side for the width and 7" to each side for the length. Using a level to create a straight line, position delicate surface masking tape to form the shape of your decal. The delicate surface tape is low adhesive so it won't pull up the paint from your cabinet's surface. Use the tape as a guide to perfectly position your decal.
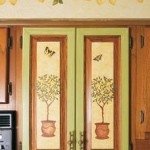
Stenciling is also a great alternative for cabinet decoration, although more permanent and not quite as easy to master.
The trick to achieving a beautifully finished look is to tape the outside corners of the stencil with delicate surface tape, and use a foam pouncing applicator in a straight up and down motion to avoid seeping underneath the stencil. Remove the stencil by pulling it straight off the surface, and remember to clean the stencil every time it is moved.
If this is your first attempt at stenciling, do some practice runs on a piece of poster board first.
When It Comes to Kitchen Decorating,
Paint Is Just the Beginning
Once you've settled on the paint colors and techniques, it's time to finish off your kitchen design with colorful appliances and accessories.
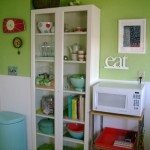
These days everything from refrigerators and stoves to spatulas and toasters comes in a wide range of colors.
When creating countertop vignettes, group items together in odd numbers for a more pleasing and balanced look.
Avoid clutter by using colorful containers to hold loose items and focusing on items used every day.
And last, but not least, have fun with it! Confidence in your design style comes from experimentation and practice.


