How to Paint Stripes
in Complex Combinations
Complex paint stripe combinations take a lot of time and planning, but with enough patience to follow the required steps, even beginner DIYers can create interesting patterns on their walls, in multiple colors and different stripe sizes.
NOTE: if you need instructions for basic 2-color, equal width stripes, see "Painting Vertical Stripes" and "How to Paint Horizontal Wall Stripes" for step-by-step tutorials.
Before You Paint Stripes
in Multiple Sizes and Colors
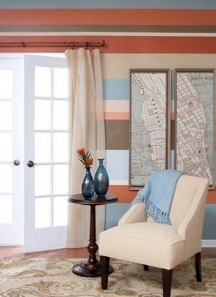
- Keep in mind that most complex stripe combinations will take
you at least twice as long to do than regular same-width, 2 color
stripe patterns (any pattern that has more than 2 stripe sizes, or more than 2 colors is considered complex).
- Choose a pattern that you understand - it's easier to get lost and make a mistake than you think. The more colors and stripe sizes in a pattern, the more involved and complicated the painting process will be.
- Be prepared to do a LOT of planning, measuring, marking and
taping - you need to have patience for advanced painting projects like
this.
- Expect the project to take a few days because normally you'll be able to do just one stripe type per day (that includes not only the preparation and actual painting, but also the drying time between the layers). Rushing it will result in peeling paint!
- Remember that the base coat color will become one of the stripes - usually it should be the widest stripe in the pattern.
How to Paint Complex
Wall Stripe Patterns

1) Find a stripe pattern that you like.
Look through home decorating magazines, browse for ideas online, visit a fabric store for inspiration, or create your own unique design.
2) Select complementing paint colors.
When creating a paint stripe design from scratch, the easiest way to come up with a pleasing color combination is to repeat the colors of some other pattern you already have and like in your decor (even if it's a flower pattern - it doesn't matter as long as the colors look good together).
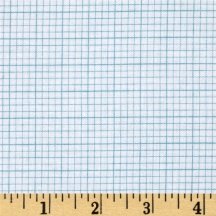
3) Lay out the design for your stripes.
Use graph paper and colored pencils to draw a full scale version of your striping design (you only need to lay out one pattern repeat). This will be your template for marking the walls.
4) Take wall measurements (in inches).
For vertical stripes, you'll need the perimeter of the room, or the width of the wall(s) that will be painted (if you are only striping 1 or 2 walls).
For horizontal stripes, you'll need the height of the wall(s) without including the baseboards, chair rail or crown moldings into the measurement.

5) Determine the pattern's repeat (in inches).
Unless you are doing a random pattern, there will be a repeating sequence of stripes in your design. Figure out how wide the repeat is (just add up the widths of all the stripes in the sequence), then divide it into the wall measurement.
You may need to weak the size of the stripes a bit to get an even number, if you don't want the pattern to be cut off at the end.
6) Protect/mask the surfaces that are not getting painted.
Apply a coat of the base color, and when dry, apply a second coat if needed. Wait 24 hours before continuing.
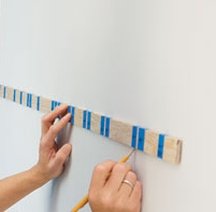
7) Mark the stripe pattern on the walls.
Press the graph paper template to the wall and tick the positions of the stripes in that sequence (alternatively, you can tape off a long ruler to use it as your template).
Then draw guide lines for the stripes in pencil, using a plumb line or a level tool (depending on the direction of your stripes).
Repeat the steps for the next sequence, and the next one, until you reach the end of the wall(s).
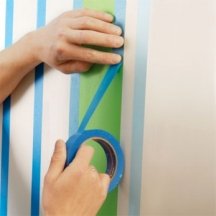
8) Tape off and paint the first stripe type.
It's usually best to divide the work by color. For example, do all green stripes first.
If needed, apply a second coat when dry to the touch, and remove the tape carefully while the paint is still wet (so it's easier to clean up any smudges. Wait 24 hours before continuing.
9) Repeat step #8 for all other stripe types in the pattern.
Keep working with one stripe type at a time and waiting for it to cure overnight, until you've completed all the stripes in the combination.
As you can see, multi-color or multi-size paint stripe patterns are very time consuming and labor intensive (all that marking and taping!).

But you don't have to stripe your entire room top to bottom (unless it's a small bathroom or a powder room).
In fact, oftentimes it's better if you don't - because in a larger space, the result may get too busy/dizzy looking (especially if done in contrasting colors).
Instead, limit complex stripe patterns only to an accent wall, or to the wall above or under the chair rail.
That way you'll create a more controlled look without losing the dynamic effect of the finish (and without killing yourself!).
See Also:
Decorative Paint Striping Ideas
How to Paint Stripes Without Taping
Tips and Tricks for Painting Wall Stripes



Leave a Comment: