Painting Vertical Stripes:
How to Do It Right
Painting vertical stripes can be a confusing, frustrating project if you don't know what you are doing.
But the following DIY instructions will show you how to measure, tape and paint them the right way.
NOTE: This tutorial is for painting basic vertical, 2-color repeat, equal width, 6 inch stripes, but you can easily adjust the instructions for a wider or thinner size (simply change the number "6" to what you want in the calculations below).
Tools and Materials for
Painting Vertical Stripes
For painting vertical stripes on the walls, you will need:
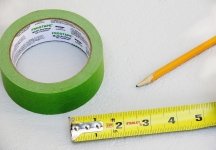
- a ruler and/or a measuring tape
- a plumb line (that you can make yourself)
- 1-2 big rolls of green Frog tape (depending on the room size)
- a pencil or a piece of chalk (in a color that will be visible on the basecoat)
- a paint brush (angled, 3-4" wide, synthetic bristles)
- a 9" paint roller (for applying the base coat)
- a 4 1/2" mini roller (for painting the stripes)
- a roller paint tray with 2 liners (to change the working colors)
- latex paint in 2 desired colors (for the basecoat and stripes)
- a stepladder
Before you begin, see "Tips for Painting Stripes on a Wall" for some neat professional painting tricks and secrets.
Instructions for Painting
Vertical Stripes
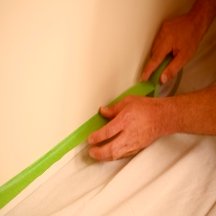
1) Mask off the ceiling and baseboards, trim around doors and windows, and other surfaces not to be painted.
Frog tape is best for painting stripes and masking (it creates sharp, clean lines) but you can also use regular blue painters' tape if you press and run the back of a plastic spoon over its edges to seal them better.
Also, cover the floors and any furniture that can't be moved out of the room with some tarps, drop cloths or plastic sheets.
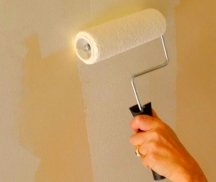
2) Apply the basecoat using the big roller (you may need to do a second coat once the first one is dry to the touch) and let it dry for at least 24 hours - you don't want the tape to strip off the fresh paint finish.
Remember that the paint color you use as the base color will be one of the stripe colors - for example, if you're painting yellow stripes over a white base coat, you'll end up with yellow-and-white striped walls.
3) Determine the width of your stripes, and measure the pattern's repeat. For example, if each paint stripe will be 6 inches, the repeat will be 12 inches.
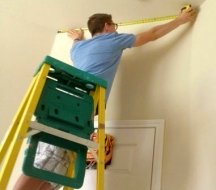
4) Measure the perimeter of the room in inches (measure the width of each wall in inches, and add them up) and divide it by the width of the repeat. You need a whole number.
For example, if the room's perimeter is 432" (an 8'x10' room) and the width of the pattern's repeat is 12" (2 alternating 6" stripes), we will divide 432 by 12, and get 36.
If your number looks something like 36.17, tweak the width of the stripes until the number is as close to whole as possible (otherwise your last stripe will be a different size than the rest).
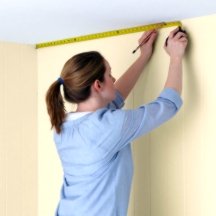
5) Mark the walls to lay out the stripes (start in the least-seen corner and move clockwise, from left to right). Using a ruler/measuring tape, mark 6" intervals around the very top of the room, under the ceiling.
Then pin a plumb line to each mark, and once the weight at the end has stopped swinging, pencil lightly along this line every foot all the way down, until you reach the baseboard. Repeat for each mark.
And when working around windows and doors, ignore them exactly as if you were hanging wallpaper.
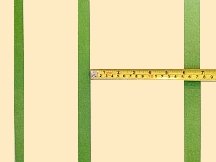
6) Tape off the stripes - press the tape firmly down along the pencil marks on the outside edge of each stripe that is getting painted.
When you are finished taping, you will have the illusion of two different widths of stripes - this means you've done it right.
The wider stripe is the one you need to paint (not to get confused, you may want to put "X" marks on the working stripes using a piece of chalk - just make sure to rub it off just before painting; never use ink, and even pencil may show through).

7) Paint the stripes using the smaller roller in the second color.
Usually you will want to first cut in along the ceiling and baseboard with a brush (unless you used a really wide tape to mask those surfaces - then you can get in the corners with the mini roller without the risk of getting paint everywhere).
Apply a second coat (if needed) after the first one is dry to the touch.
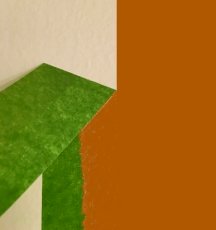
8) Remove the tape after the finish is dry, and touch up any paint that has seeped under using a small artist's brush or a Q-tip.
Minor spots can be simply rubbed off with a dampened paper towel wrapped around your fingernail (fresh latex paint is easy to remove).
And enjoy the beautiful results of your efforts!
As you can see, when painting vertical stripes, most of the time is spent on measuring, marking and taping, while the actual painting is accomplished quickly - but the results always justify the careful preparation, so don't skip any steps.
See Also:
Decorative Paint Striping Ideas
How to Paint Stripes Without Taping
Tutorial for Painting Horizontal Wall Stripes



Leave a Comment: