Rag Painting the Walls for a Faux Tuscan Effect

Faux Tuscan finish created with glaze and cheesecloth
The warm and vibrant colors used in this rag painting technique remind us of the baking heat of a Tuscan summer, and the rough and uneven texture of the walls creates the illusion of old faded surfaces and peeling paint.
To achieve this effect, a rich terracotta colored glaze was sparsely applied with a roller on top of a cream colored base coat, and while still wet, overlaid with a wet cheesecloth.
Preparation
Prepare your surface following the instructions in the basic ragging tutorial. You'll need the same tools and materials for this technique, plus a mini roller.Mix your colored glaze according to the recipe on that page.
NOTE: this finish can be done using a regular lint-free rag, but a cheesecloth will texturize the glaze better and create a more realistic, antiqued effect. Test it on a board and see which result you like better.
Application
1) Roll on the colored glaze on the surface in vertical and horizontal strokes.The application should look blotchy - leave some patches of color that are heavier than others, and areas where more base coat is seen. You don't want an opaque layer of color!
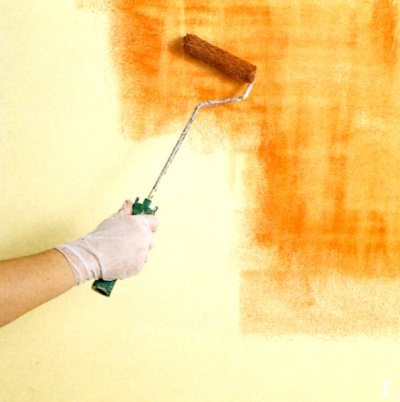
When loading the roller, pick up only a little bit of the glaze - don't saturate it completely.
Work in sections no more than 4 square feet at a time and feather out the outer edges of each section to help the next one blend in.
2) Soak a rag or cheesecloth in water and wring it out. Wearing gloves, dip it into the colored glaze and squeeze out the excess liquid, so that it is not dripping.
Unfold the rag and lay it on the wall, pressing it to the surface and smoothing it lightly with your gloved hand.
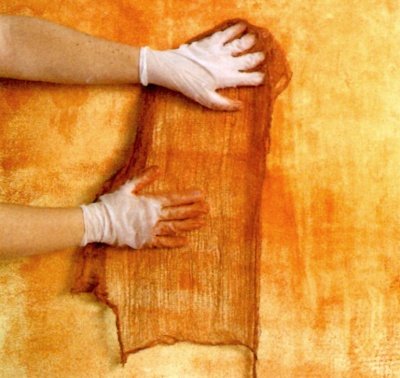
Continue this technique randomly over the entire glazed section. Then fold the rag and use it to blend any roller marks or fingerprints, but do not blend away the overall weave pattern.
Finally, rinse the rag in water, squeeze it out and dab in various areas to lighten some patches.
3) Move onto the next section and repeat Steps 1 and 2, working the new glaze into the previous area. Continue glazing and texturizing like this until you've covered the entire surface.
At the end, bunch up the cheesecloth dampened with the glaze and press it to the spots that look too thin or smooth.
Touch up the corners and edges along the perimeter of the walls so that they don't look lighter than the main area (making them a bit darker will add to the authenticity of the look).
|
||
|
||
|
||
|
||


