Sponge Painted Bedroom Walls With Orange Accents
by Jenny
(Chicago, IL)
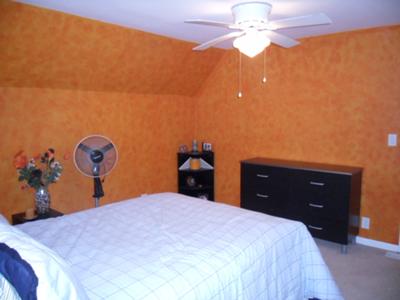
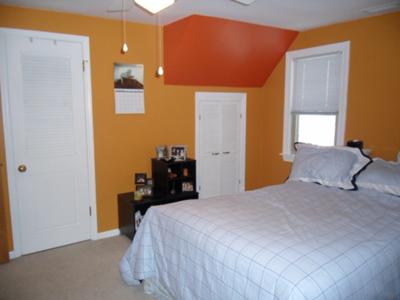
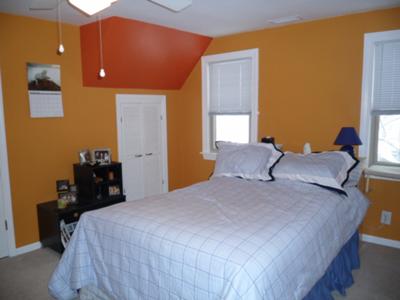
The 2 orange sponge painted walls
My husband and I sponge painted one of our spare bedrooms. We have never done anything like this before, but it turned out to be a great experience and extremely rewarding once finished. We stepped back and admired our hard work and it looked awesome!
We bought all of our faux painting supplies from Home Depot. We got a sea sponge, a light orange base coat (pumpkin color), a darker orange top coat and a gallon of faux glaze.
We chose orange because we don’t have children yet, but plan on having kids in the future, so of course we don’t know if it will be a boy or girl and figured that orange could go either way.
Further, we were inspired to paint the room because when we bought the house the room was painted an awful light pink and mint green color with a giant “R” on the wall, so the kid whose room this used to be must have had a name starting with the letter “R”.
First we painted the ceiling in flat white and all trim, windows, doors, baseboards in traditional semi-gloss white.
Then we painted the walls in the lighter orange color. We let it dry for 24 hours. Next we painted, what we call, our accent triangle on one side of the room with the darker orange color.
Next, we mixed 4 parts faux glaze to 1 part of the darker orange paint (make sure to mix enough to cover the area you want to paint all at once because if you run out and try to remix the color may or may not come out the same).
We then dipped the sponge in the mixture and sponged it on the wall while twisting the wrist so as to avoid a pattern. We did 2 of the 4 walls with the darker sponging and left the other 2 walls as the lighter pumpkin orange and the room looks amazing!
A major tip for others who have never done this is to do the sponging in 3 foot sections, and when you start the next 3 foot section, start farthest away from the edge you just sponged and work your way in. This will help minimize dark lines that you get when overlapping the sponging.
Click here to share your sponge painting idea and see your name in lights!
Return to Sponge Painting Ideas.

