Tutorial for Rag Painting with a Cheesecloth

Cheeseclothing creates a finer finish than ragging
Thin, gauze-like cheesecloth (the material used here to remove glaze) is what produces the subtle texture of this subtractive paint finish and offers a softer effect than ragging off with a cotton cloth.
Preparation
See the instructions for basic ragging off to learn what tools and materials you'll need, how to prepare your surface for glazing, and the recipe for mixing your colored glaze.You can buy cheesecloth in packages at home improvement centers, hardware stores and even some supermarkets. You'll need 3 packages for a medium sized wall.
TIPS: Work with large cheesecloth pieces - measuring no less than 2 feet by 2 feet. You can cover more space with them and avoid getting finger marks on your surface.
Cut the cloth carefully (don't rip it to size!), and fold the pieces so that the outside edges are tucked in to keep loose threads from getting into the wet glaze.
To remove a lot of glaze and thus achieve a lighter effect (when working a darker glaze over a lither base), change your cloth often.
Before applying a new cloth to the surface, "ink" it first by spreading a thin layer of glaze on a board or palette, and rolling the cloth in the glaze. This will stop the cloth from absorbing too much glaze and creating a "hole" in the finish.
Application
1) Apply the glaze with a mini-roller or a brush (depending on the size of your surface) to a 3'x3' section.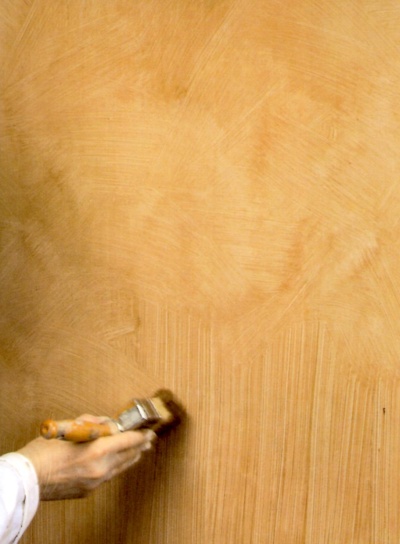
If you use a brush, do it in a criss-cross fashion - first top to bottom and then across with short, angled strokes (to break the strie effect and create a textured background).
2) "Ink" the cheesecloth and bunch the cloth in your hand (as described earlier), and dab the surface lightly. Start in a top corner and work down the glazed section.
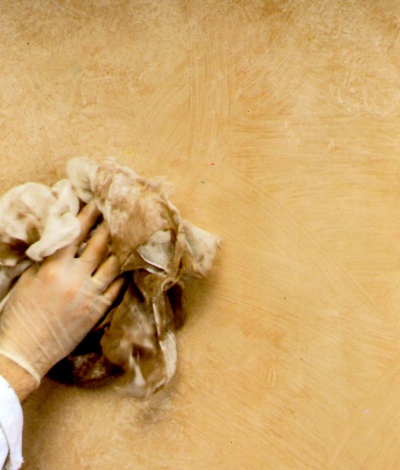
To avoid creating a repetitive pattern, move your wrist from side to side each time you lift the cloth from the surface. Re-bunch the cloth frequently to vary the imprints.
3) For finer texture, rework the surface again lightly.
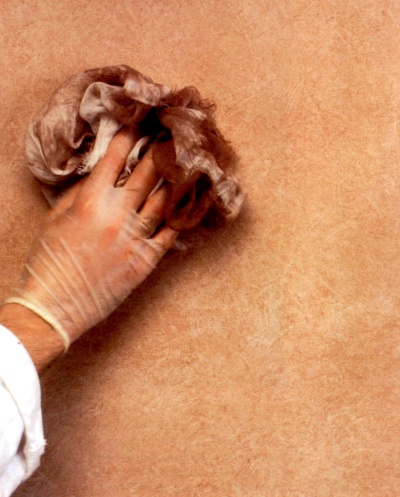
The more you go over it, the subtler - and the paler - your final texture will be (provided your base coat is lighter than the top glaze coat).
4) Apply another 3'x3' section of glaze below the first one and repeat Steps 2-4, carefully blending the section joints.
Work down like this till you reach the bottom of the wall. Then return to the top of the wall and begin glazing downwards again, overlapping the strips just slightly so that no line forms between them.
If you have a painting partner, one of you will paint on the glaze and the other will remove it. This will make the process faster, so the painting partner can get a bit further ahead of the glazing partner - but not so far ahead that the glaze begins to dry before it can be lifted.
Stand back often to see your work from a normal viewing distance, and touch up any unbalanced areas immediately, while the glaze is still open (wet and workable).
Also check that the corners are well blended into the main finish.
|
||
|
||


