Sponge Painting Techniques:
Ideas and Examples
Sponge painting techniques can be done using a natural marine sponge or a regular kitchen sponge, in contrasting or subtle color combinations, and in various sheen and transparency levels.
As you will see below, there are several ways to apply or remove glaze with a sponge and create a unique look and feel.
How can the same sponge painting technique (whether positive or negative) look so different?
It's all in the execution - the way you work the sponge, your choice of colors and how you layer them, and your actual glazing recipe.
NOTE: need instructions for the sponge painting techniques below? Then see the tutorials "How to Sponge Paint On" and "How to Sponge Paint Off" for detailed how-tos.
Not Your Mother's
Paint Sponging

Do you still think of sponge painting as those jarring, overdone finishes from decades ago?
Fortunately, sponging has come a long way since the 1980s when high contrast in colors and heavy application was all the rage.
These days, successful sponged finishes require a lighter hand and more subtle, well thought-out color combinations.
Mind you, the effect can still be very impressive and dramatic if that's what you want (the proof is in the pictures below), but when it's done in earthy and closely related colors, the result looks not only more organic, but also timeless... less forced, don't you agree?
43 Examples of
Sponge Painting Techniques
...by application
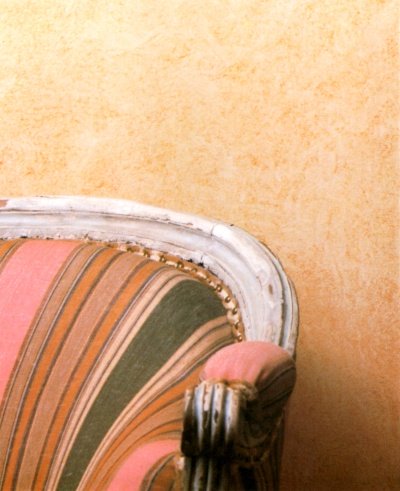
The photo above is an example of basic sponging on.
Notice how the juxtaposition of the speckled wall finish and the striped furniture here is similar to how various prints are effectively combined in decorating.
The color of the glaze repeats the colors of the upholstery stripes, pulling the space together with one common denominator.
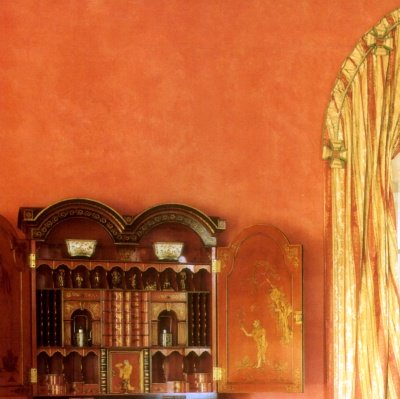
And this is what sponging off looks like.
Here in this living room, a bold orange color glaze was applied and then lifted off from the yellow painted background, using a sea sponge.
Both colors were clearly taken from the existing decor elements, for a dramatic but unified effect.
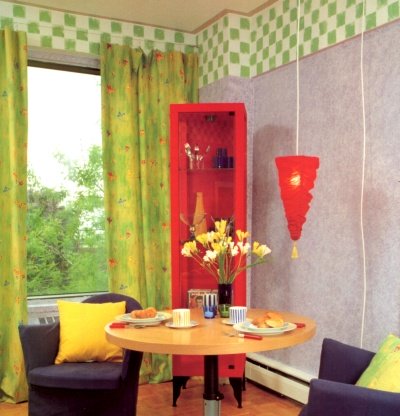
Because of the speckled nature of the additive sponging finish, it can easily overwhelm a space, if done in a contrasting combination.
But these lilac walls show that you can make sponging work even in an
already lively decor, if the contrast is kept low between the base and glaze color(s).
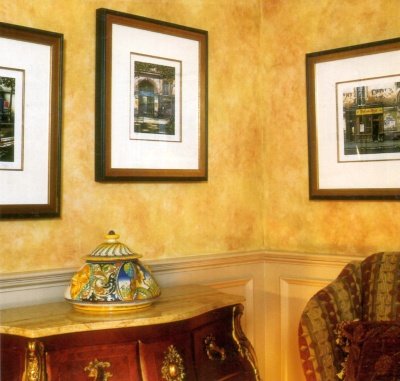
Subtractive sponging, on the other hand, can usually handle much more contrast without looking busy - that is due to its softer, cloud-like texture.
In fact, sponging off actually requires that there be a bit more difference between the base coat and glaze colors than for sponging on - not enough contrast, and the finish will be invisible.

And here's an example of subtle additive sponging - a moderate yellow color was applied over a pastel yellow base coat.
The beauty of low-contrast sponging applications comes from the textured effect they create, not from the actual color combination. The result is a graceful finish that will look relevant for a long time.
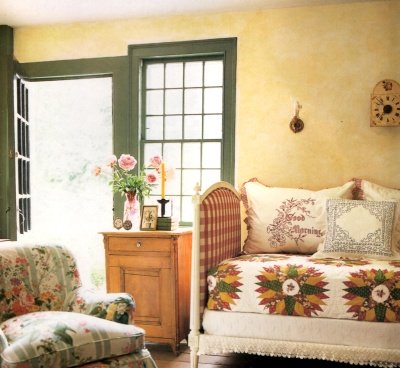
Sponging off can be done in a low-contrast palette, also - as long as you can still see some difference between the shades once they are overlaid (test the combination on a cardboard first).
Depending on the colors used for the technique, the result can often resemble soft suede texture or an old-fashioned lime-washed finish.
In the picture above, the walls look very much like old plaster, and the country-style, rustic decor is reinforcing the painted effect.
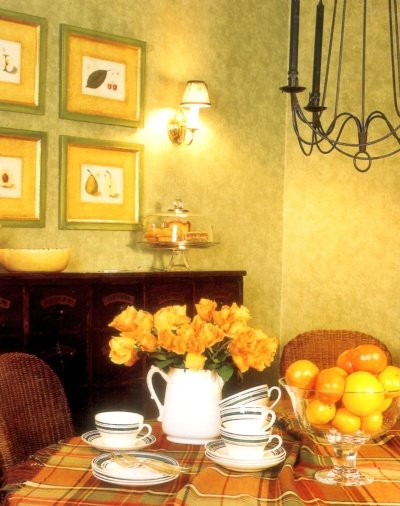
As a guideline, remember that the denser and more structured the sponging pattern, the more formal and traditional it will look - similar to wallpaper.
So if you like wallpaper, consider this application instead - unlike the real thing (which is a pain to remove), when you get tired of the look, all you'll need to do is simply paint over it with a solid color.
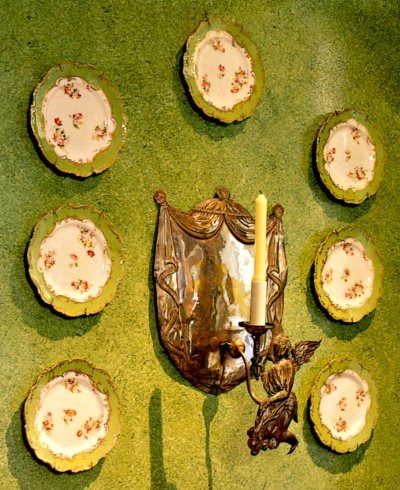
Subtractive sponging can be done densely as well - here an oil-based, moss green glaze was lifted off a cream colored wall, using the tips of a grass sea sponge, and rinsing it often to keep the imprints crisp.
The effect of this particular sponge painting technique resembles additive sponging in some ways, with a finish that looks slightly crunchy but without the dotted pattern typical of sponging on.
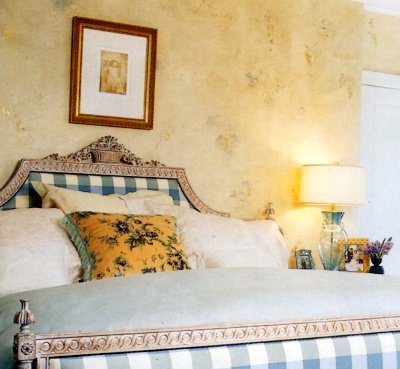
The more open and loose the pattern, on the other hand, the more laid back, painterly and even whimsical the final effect will be - just like in this bedroom example where a sponge was used in a scattered manner over the previously colorwashed surface.
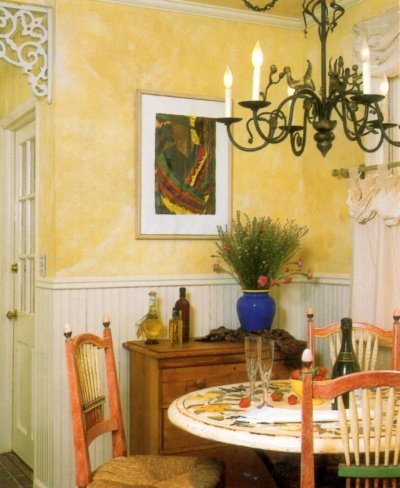
... and the same is true for sponging off.
See how much more casual this sparse pattern looks, compared to the moss green example shown earlier?
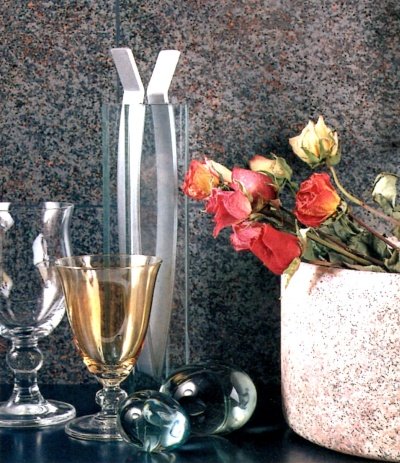
Positive sponging is also a great and easy way to create an illusion of stone texture on a smooth surface.
In fact, the faux granite painting technique is done by using a simple three-color sponging process finished with some spattering.
That's exactly how the flat wall boards above were made to look like rough stone tiles.
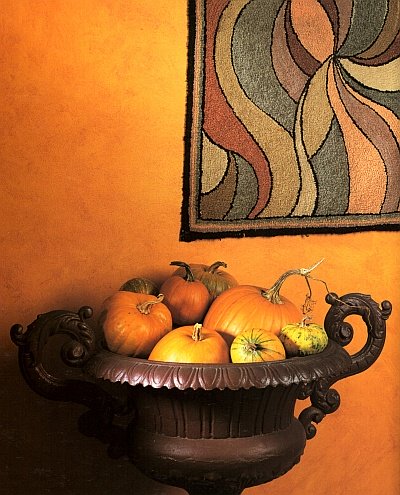
But sponging also works over an existing wall texture, like in this example - where a stucco wall was sponged off in 1 color, to play up the roughness and create an even bolder mottled finish.
...by room
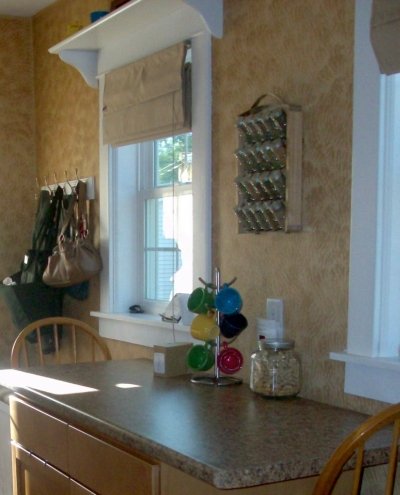
Sponge painting techniques are appropriate for any room in your house - with modifications, the result can be as formal or as playful as you like, and anything in between.
The kitchen walls above were done with a grass sea sponge (thus the discernable repeating imprint pattern) - the dense and structured finish resembles textured wallpaper with a fitting rye field-like design.
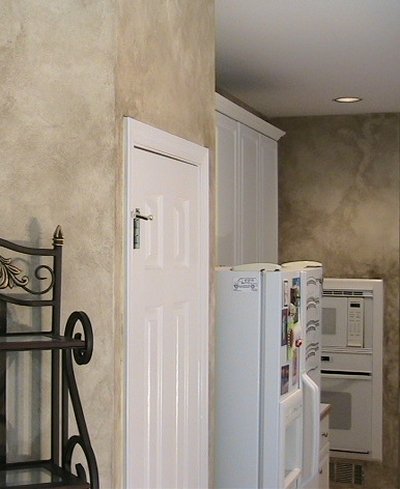
This kitchen finish looks more dramatic because it was sponged off in random sections, with longer wait times than is usual for subtractive techniques.
As a result, this method created slightly dried edges and coarser texture that give more depth and character to the finish.
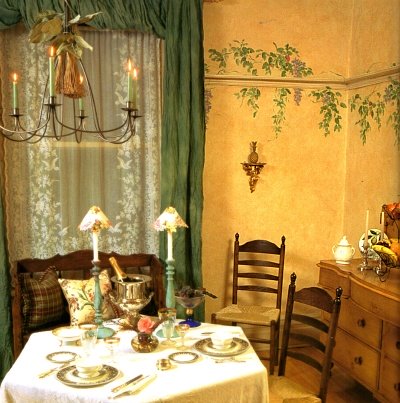
The low-contrast sponged on wall finish above makes a perfect backdrop for this pretty, welcome look - it's the soft terra-cotta colors that give this effect, and the hand-painted wisteria adds a bit of whimsy and old-fashioned charm.
In daylight, this dining room is fresh and sunny, but in the evening, with the right lighting, the room takes on an intimate, romantic glow.
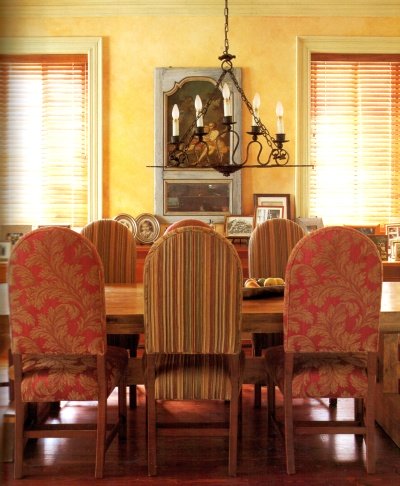
Decorative paint finishes hold pride of place in a traditional room, and make a fresh alternative to wallpapers - like in this formal dining room that was sponged off in a tone-on-tone color combination.
You can layer colored glazes to build drama, depth and "history", as they allow you to use even strong colors without the heaviness of a solid surface of opaque paint.
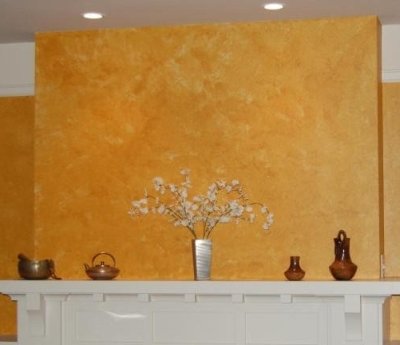
As you can see, sponge painting works well in most settings - the final effect depends on how glaze is applied and the colors chosen.
In this living room, the walls were sponged on in different shades of yellow - the finish contrasts well with the white of the millwork.
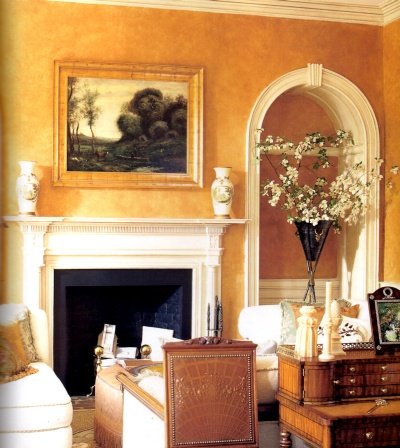
The paint and glaze colors used in this living room are very similar to the previous example, but the final result is "quieter", because the glaze was sponged off instead.
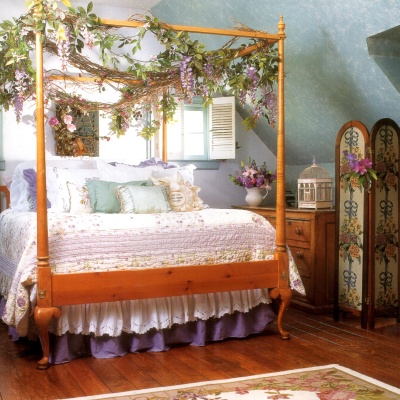
The light-over-dark color application used in sponge painting this country-style bedroom makes the finish look chalky - usually not desirable, but here it's a perfect fit for the shabby chic decor.
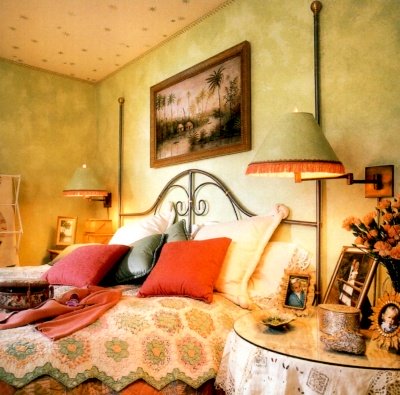
Here, the sponged off wall finish echoes the soft fabric textures used in this bedroom, and blends in beautifully with the craftsy decor.
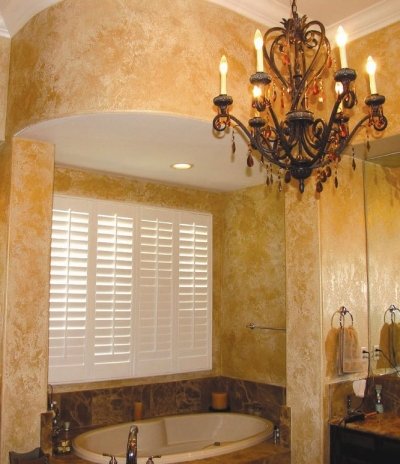
It takes several layers of tone-on-tone, multi-sheen glazes (applied randomly using different semi-dry sponges) to achieve such a gorgeous sponged on finish.
Truly, now this master bathroom is fit for a queen!
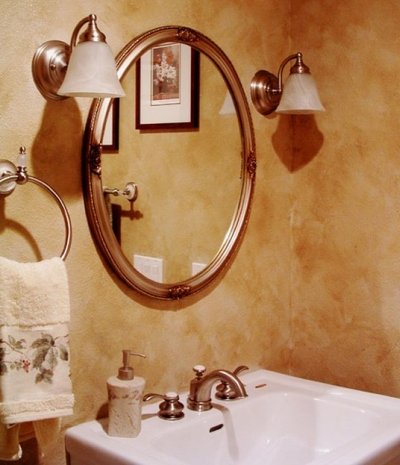
While not as dramatic as the previous example, this sponged off finish resembles the soft mottled texture of suede, and envelopes this powder room in a layer of warmth and cozy.
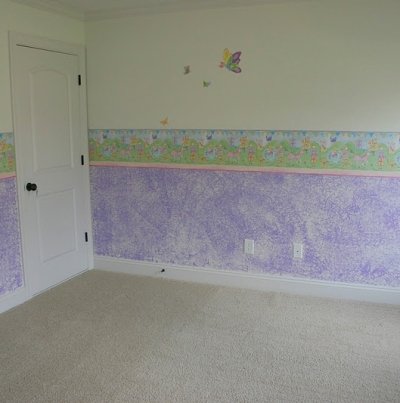
And here's an example of using a regular kitchen sponge in decorative painting.
In this baby girl nursery, a semi-dry sponge was lightly pressed all over the bottom part of the walls, creating a very smart and practical finish that will hide many stains, scratches and fingerprints of the first few years.
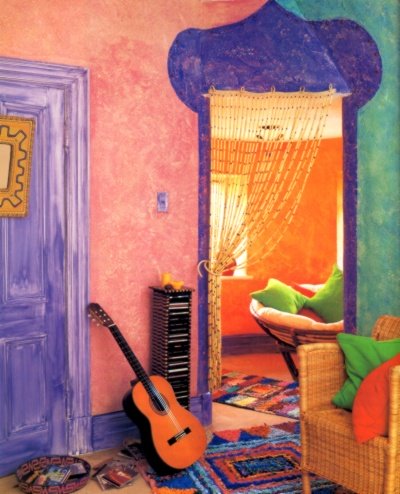
All the decorating rules have been broken in this young den, but to a great, funky effect.
The stucco walls were sponged off with some really vivid colors - orange, pink, green, violet, blue - that fill the space with a warm and flamboyant Caribbean spirit.
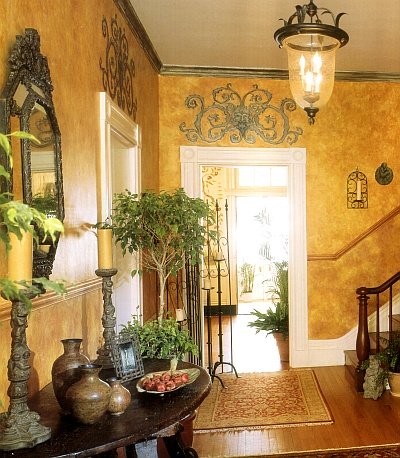
An entry hall with a decorative painted finish makes a big impression upon entering a home.
Here, several layers of the same color glaze (diluted differently) were loosely sponged on to add depth and create a finish that look rich, rather than busy.
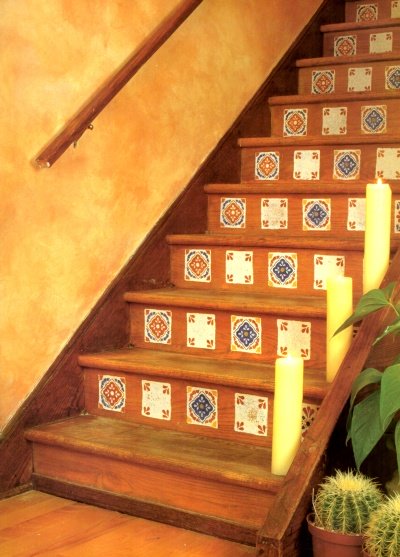
The look of sponge painting techniques can be easily customized to satisfy any taste, and adapted to suit any decorating situation - from Italian to Mexican, from traditional to contemporary styles.
It's all about what colors you choose, how many of them you combine in a finish and what method you use to layer them.
On the hallway wall here, the sponged off finish leaves the illusion of a slightly uneven or aged surface, which intensifies the room's rustic feeling.
...by surface

Sponge painting techniques are suitable for any flat, relief-free surface - including ceilings and plain furniture.
This vestibule ceiling has been sponged in brown over yellow to complement the walls, then finished off with some spattering to imitate stone.
Rather than paint the moldings separately, the decorator chose to make fewer breaks in this small space and carried the painted effect over the moldings to create continuity.
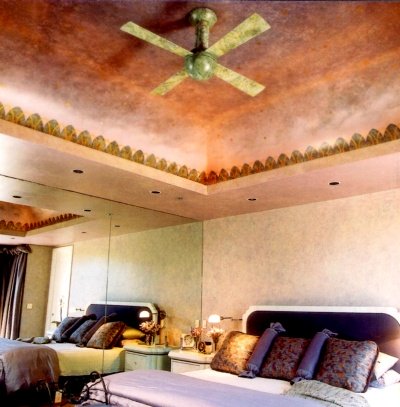
Paint and glaze were used to create this outer space-inspired finish as well.
Several layers of sponged off glaze in multiple colors gave this bedroom ceiling a deep translucent quality that could never be achieved with undiluted paint.
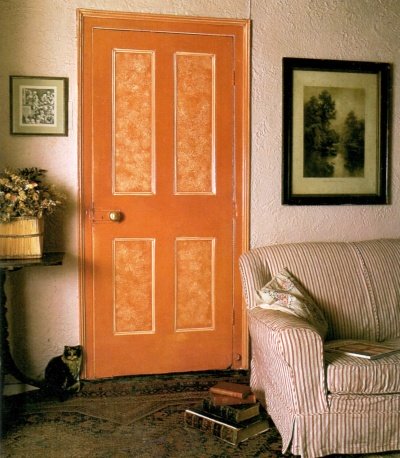
The panels of this door have been sponged on in a fairly casual manner, as if an afterthought, playing up the relaxed vibe of the room.
But to contain and balance the looser finish of the inner panels, the outer parts of the door and frame were color wiped in the same yellow.
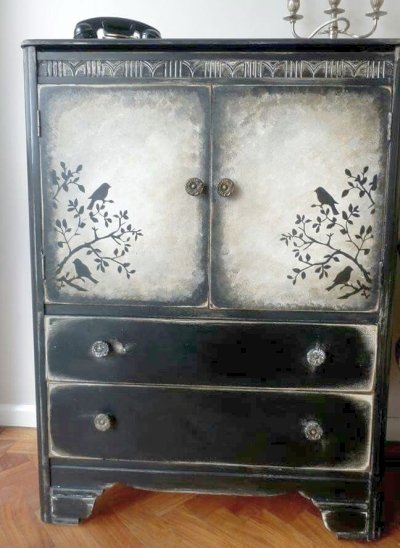
And here's a great example of using sponge painting to transform an old and boring piece of furniture into something worth talking about.
With some paint leftovers, stencils and out-of-the-box creativity, this flea market find has been turned into a real show stopper!
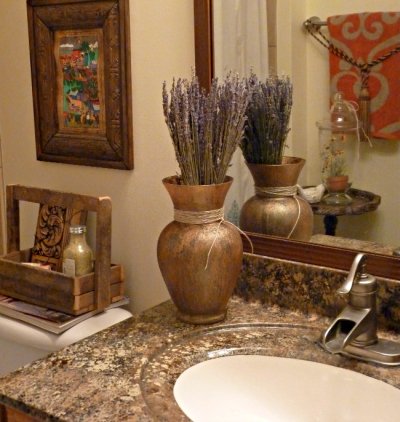
Basic sponge painting techniques let you not only easily imitate granite tiles on the walls, but also transform plain shaft pillars, laminate countertops, dated vanities and tabletops into convincing stone finishes.
It's a much cheaper alternative to installing the real thing and, with proper surface preparation and a quality sealer, will last for quite a few years.
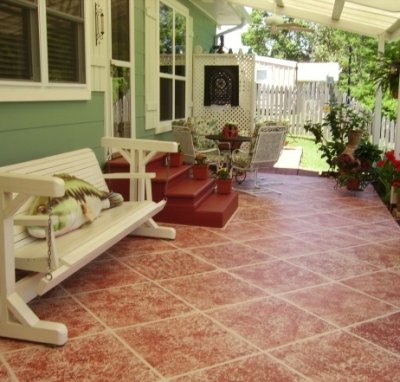
Paint sponging techniques can be used on the outside, too.
Here, a plain concrete, painted deck has been taped off to create a tiled look, sponged in terra-cotta colors and then top-coated with a heavy-duty sealer for protection and durability.
The result is a much warmer and cozier sitting area.
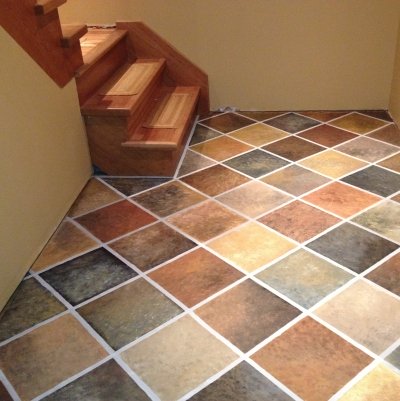
And this is the same idea implemented inside a home - a number of different organic colors were used to create this realistic look on the hallway floor.
...by design
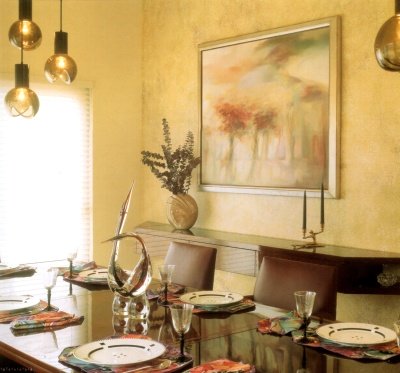
Sometimes less is more, and there is no need to sponge paint an entire room when a single wall (or even a smaller section) can create the effect you want - it all depends on your decorating goals and vision for the room.
In this photo, an accent wall was created with subtle sponging - the translucent imprints echo the earthy colors of the artwork and help anchor the focal point.
The
low-contrast sponged on finish is a background player: it's there to
just give a boost of color, texture and interest, but not create much
drama or compete for attention.
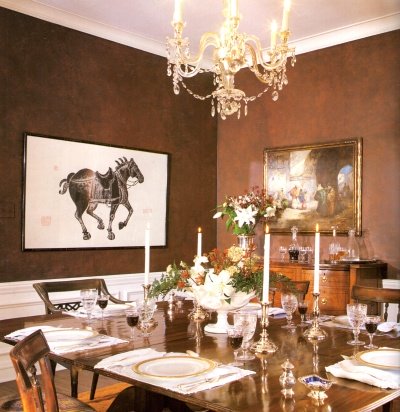
When art and/or furniture are the focal points in a room, the wall color and finish should play a supporting role and create a complementing background for the real stars of the show to shine.
Here, the understated sponged off finish does just that - it enhances, rather than overwhelms the decor.
But notice how the feature wall in this example is created by using a slightly different color, while keeping the same finish as the rest of the walls (the deeper shade of brown sets a direction and draws the eye to the painting the decorator deemed most important in the room).
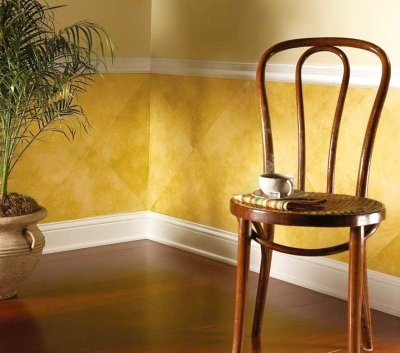
Tone-on-tone, subtle sponged finishes make an excellent backdrop for casually elegant interiors and furnishings.
But to add a unique twist to the timeless look, the bottom part of these hallway walls has been taped off in a diamond pattern and then sponged off with a glaze tinted a deeper shade of yellow than the base color, creating an interesting yet still restful effect.
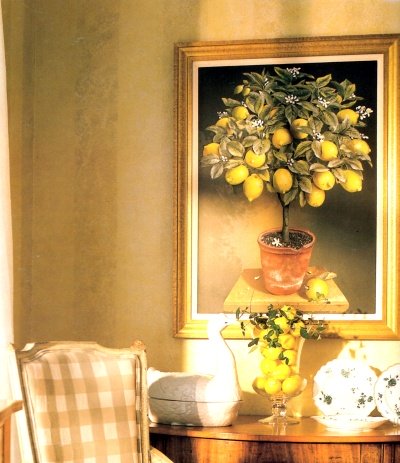
Sponged wall stripes? Why not!
Here, 2 adjoining colors from the same paint card were used to create this hand-painted interpretation of classic, striped wallpaper.
The stripes set a traditional, welcoming tone for this entry, while the faded finish contributes a quiet background that works with a variety of fabrics and textures.
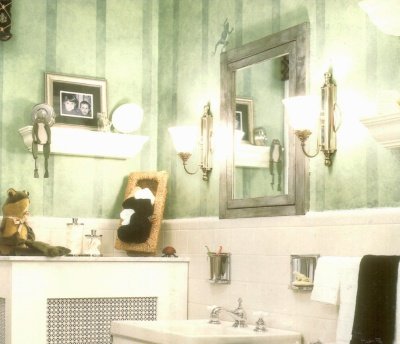
In this example, the subtle tonal variations of the sponged off finish combined with the timeless pattern create an even more complex, sophisticated striping effect.
The walls are sponged off in their entirety, but the 2 widths of stripes are set off in different shades of faded green.
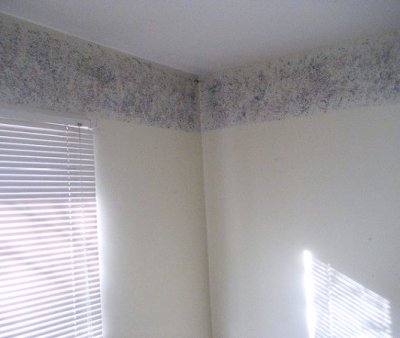
One really minimalist approach is to simply sponge paint a wall border.
You have many options when it comes to actual execution - the border can be placed at the top or in the middle of the walls, it can be traditionally straight, diagonal or zig-zag shaped, with clean or feathered edges and so on.
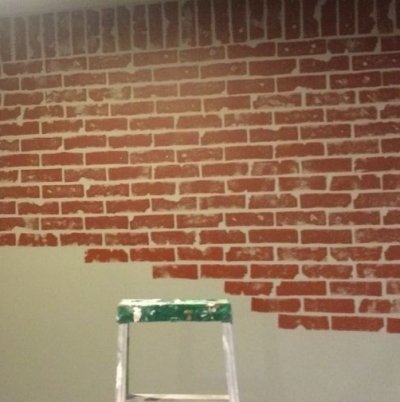
Now here's a really smart sponge painting application and a fun way to create an impressive imitation of a brick wall.
All you need to produce this effect is a few large household sponges (so that the imprints don't all look the same) and some brick colored paint (undiluted - you want it to be thick).
This technique works great as an all-over finish, on a single wall or even just around a fireplace.
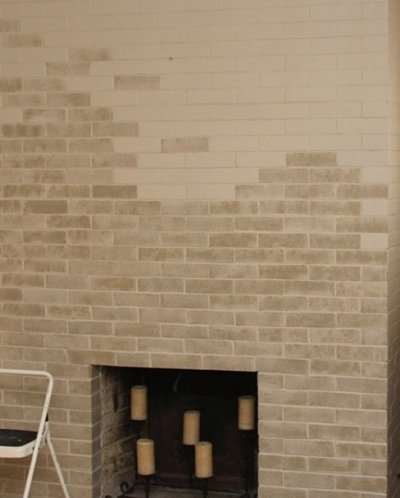
But sponging can be used over existing brick as well, as shown here - the painted brick has been partially sponged off for a more stylized effect.
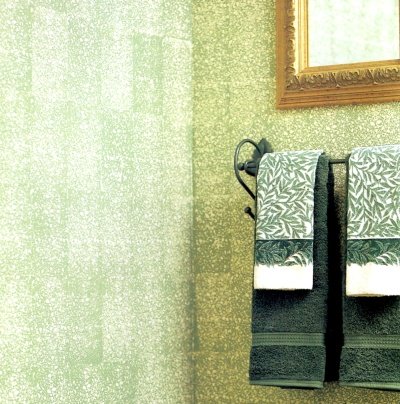
And here's one more example of sponging used as stamping.
In addition to the interesting texture and color play it creates, the finish resembles tiles and so is perfect for decorating the walls in small powder rooms and kitchen backsplashes.
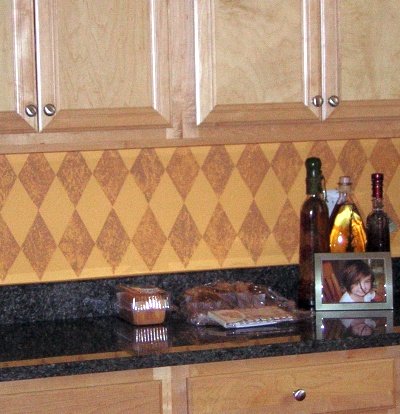
These backsplash "tiles" look like they've been stamp painted too, but they were actually created with a regular sea sponge - first by taping off the harlequin pattern and then sponging off select squares.
Sponge Painting Ideas
From Our Visitors:
So enjoy the ideas, get inspired and don't forget to leave a comment!
And if you have your own sponge painting project to share, click here and see your name in lights.
Sponge Painted Bedroom Walls With Orange Accents
My husband and I sponge painted one of our spare bedrooms. We have never done anything like this before, but it turned out to be a great experience and …
Paint Sponging Finish "Faux Brick" on Our Kitchen Backsplash
This sponging paint finish is done by using a rectangular kitchen sponge, and is very cost efficient. Our kitchen looked terrible before, and the old …
My Faux Paint Sponging Bathroom Project
After thumbing through a book on faux-finishing methods, I decided to attempt the sponging technique in my hall bathroom. I chose this particular finish …
Sponge Painting Finish on My Bathroom Walls
When we first moved into our new house, I decided that I did not want a solid wall color in our bathroom, but my husband was adamantly against wallpaper. …
Paint Sponging Finish on My Living Room Walls
I decided to try paint sponging in my living room because I didn’t want a solid color. I wanted to add a little texture and dimension to the room, rather …
Faux Painting Finish "Sponge Painting"
I went with sponging because I was redoing this room in my house and installing some natural wood wainscoting on the bottom of the walls. While trying …
Faux Painting Finish "Sponging" in My Bedroom
About 6 years ago, I acquired the loft bedroom at my parents' house. The walls were a very bland whitish-beige. I hated it. I grew up in the beautiful …
See Also:
How to Sponge Paint ON the Walls
How to Sponge Paint OFF the Walls
Tips and Tricks for Sponge Painting Walls





Leave a Comment: